How to Merge All Your Google Calendars into One Unified Inbox
Stop switching between accounts. Learn how to merge work, personal, and shared calendars into a single, organized view with nocal.
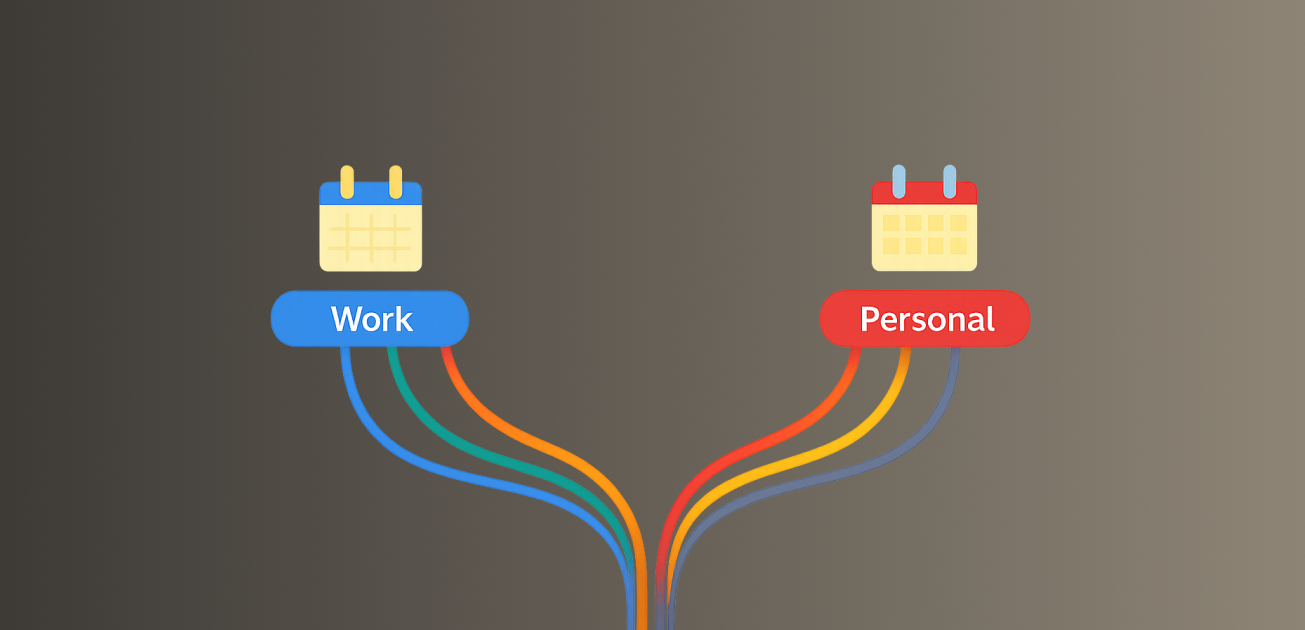
You know the dance. You're in your work calendar trying to find a slot for a meeting. But you also need to check your personal Gmail calendar to make sure you're not double-booking a dentist appointment. And then there's the shared team calendar that lives in yet another view.
You end up with three tabs open, mental math determining your availability, and a constant fear of missing something.
It doesn't have to be this way. Your time is a single resource; your calendar should be a single view.
In this guide, we'll show you how to use nocal to merge every Google Calendar you own into one unified view and inbox—without creating a mess.
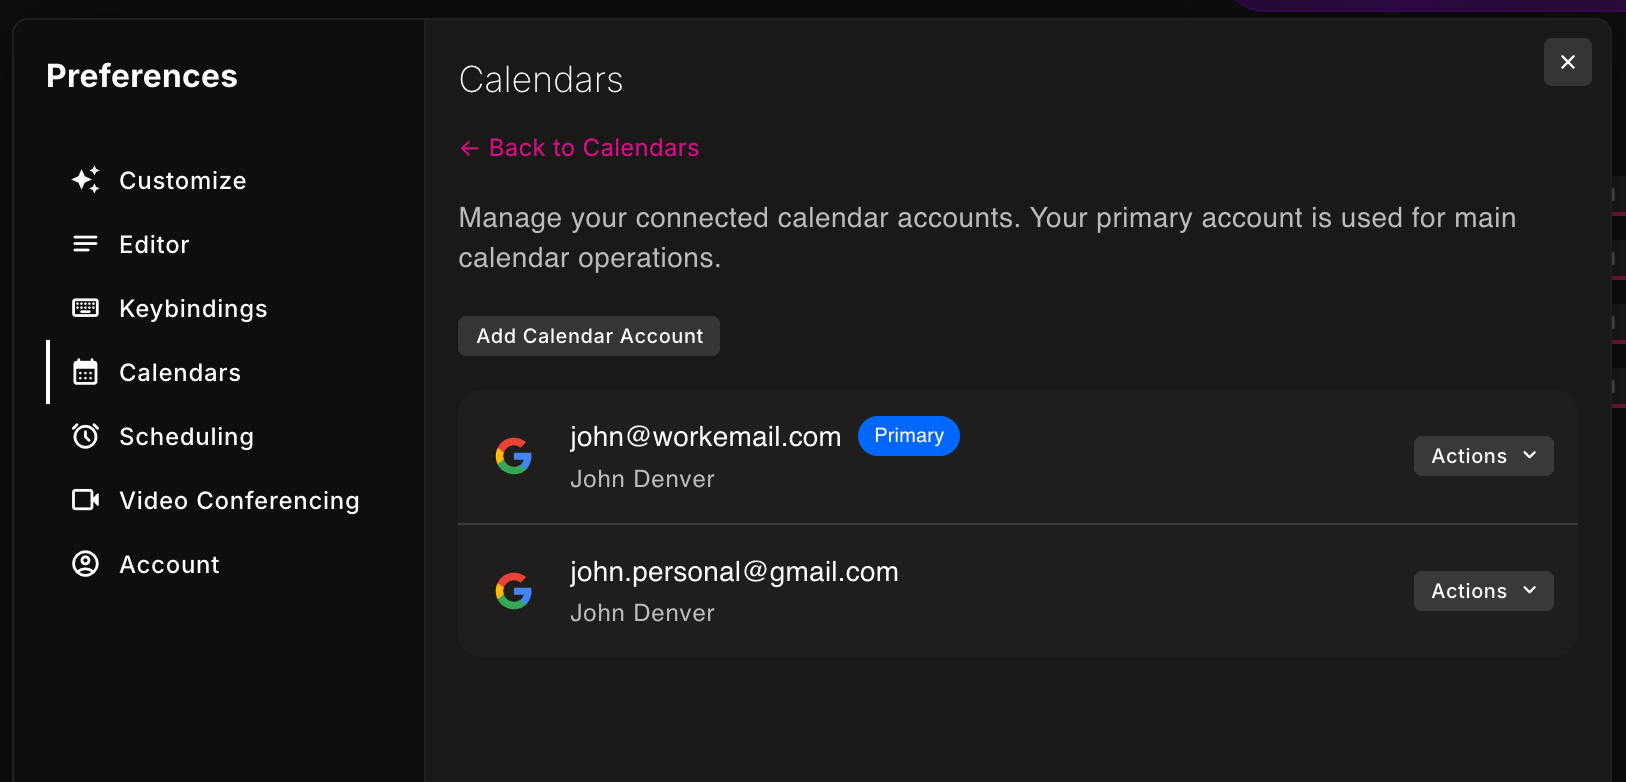
Step 1: Connect Your Google Accounts
The first step is to connect all your Google accounts to nocal. Here's how:
- Open nocal Settings — Navigate to Preferences (or Settings) in the nocal menu
- Add Google Account — Click "Add Account" or "Connect Google Account"
- Authenticate — Sign in with your Google credentials (work, personal, or any other account)
- Repeat for each account — Add all the Google accounts that contain calendars you want to merge
Why this works better than subscribing: Unlike subscribing to calendars (which often has permission issues), nocal authenticates directly with each account. This gives you full read/write access across Work, Personal, Family, and Shared calendars in one local app.
Once connected, nocal automatically pulls in every calendar associated with each account—no manual setup required.
Step 2: Create Context Groups
Now that all your calendars are loaded, organize them by the way you actually work:
- Open Calendar Settings — Go to your calendar preferences in nocal
- Create a new group — Click "Add Group"
- Name your groups — Create groups like:
- Work: main work calendar, team calendars, project timelines
- Personal: family, personal tasks, social events
- All: a complete view when you need it (optional)
- Assign calendars — Drag calendars from your list into the appropriate groups
Pro tip: You can switch between groups instantly to change your focus without losing any data. When you're in "Work" mode, you see only work calendars. Switch to "Personal" and your view changes immediately.
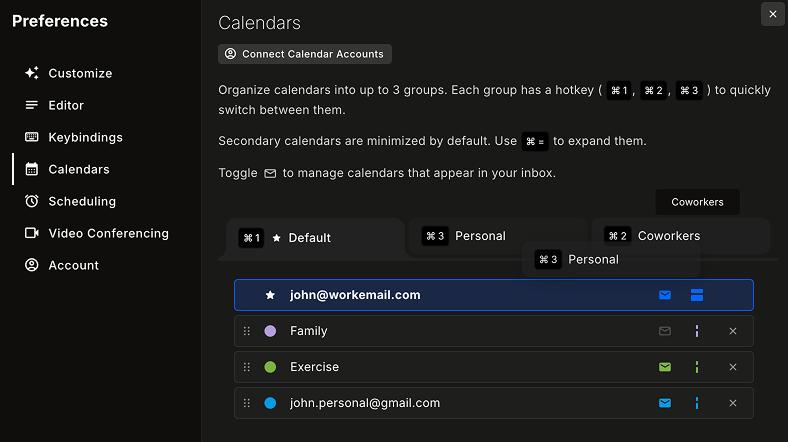
Step 3: Set Priority Ordering (Smart Defaults)
Within each group, re-order calendars and define a "default" for the group:
- Open a context group — Select the group you want to configure (e.g., "Work")
- Drag and drop — Reorder calendars by dragging them up or down
- Top calendar = default — The calendar at the top becomes the default for new events in that context
What this means:
- New meetings created in Work mode automatically go to your work calendar
- New plans created in Personal mode automatically go to your personal calendar
- You stop thinking about where events should live—the context decides for you
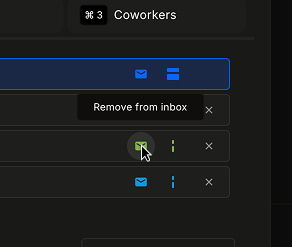
Step 4: Configure Calendar Visibility and Inbox Behavior
Each calendar has two toggles that give you precise control. Here's how to set them up:
- Find the calendar — In your calendar settings, locate the calendar you want to configure
- Inbox toggle — Decide whether invites from this calendar appear in your unified inbox
- On: Invites appear in your inbox (good for calendars you actively manage)
- Off: Invites are hidden (perfect for shared calendars where you just need visibility)
- Expand/Contract toggle — Control how the calendar appears in your timeline
- Expanded: Shows full event details
- Contracted: Appears as a slim, colored bar on the edge of your day. Contracted calendars can be instantly expanded and re-contracted using a hotkey.
Example setup:
- Work calendar: Inbox ON, Expanded
- Family shared calendar: Inbox OFF, Contracted (you see it but don't need to RSVP)
- Personal calendar: Inbox ON, Expanded
Step 5: Use Focus vs. Awareness Mode
Some calendars are for doing, others are for awareness. Here's how to use contracted calendars:
- Set calendars to contracted — Use the expand/contract toggle from Step 4
- View your timeline — Contracted calendars appear as slim, colored bars on the edge of your day
- Stay aware without distraction — You can see events are happening without full details cluttering your view
- Expand when needed — Click the bar or use a hotkey to expand and see full details
When to use this:
- Family calendars you want to see but don't actively manage
- Shared team calendars for awareness
- Personal calendars during work hours (and vice versa)
Your work meetings stay front and center; your family events stay visible but out of the way.
Step 6: Set Up Your Unified Inbox
Stop checking email for calendar invites. Here's how to consolidate everything:
- Open the Inbox — Navigate to the Inbox view in nocal
- Review your settings — Check which calendars have their inbox toggle ON (from Step 4)
- Adjust as needed — Toggle calendars in or out of your inbox based on your needs
What you'll see:
- All invites from calendars with inbox enabled
- Work meetings, family events, and shared calendar invites—all in one list
- Ability to RSVP directly from the inbox
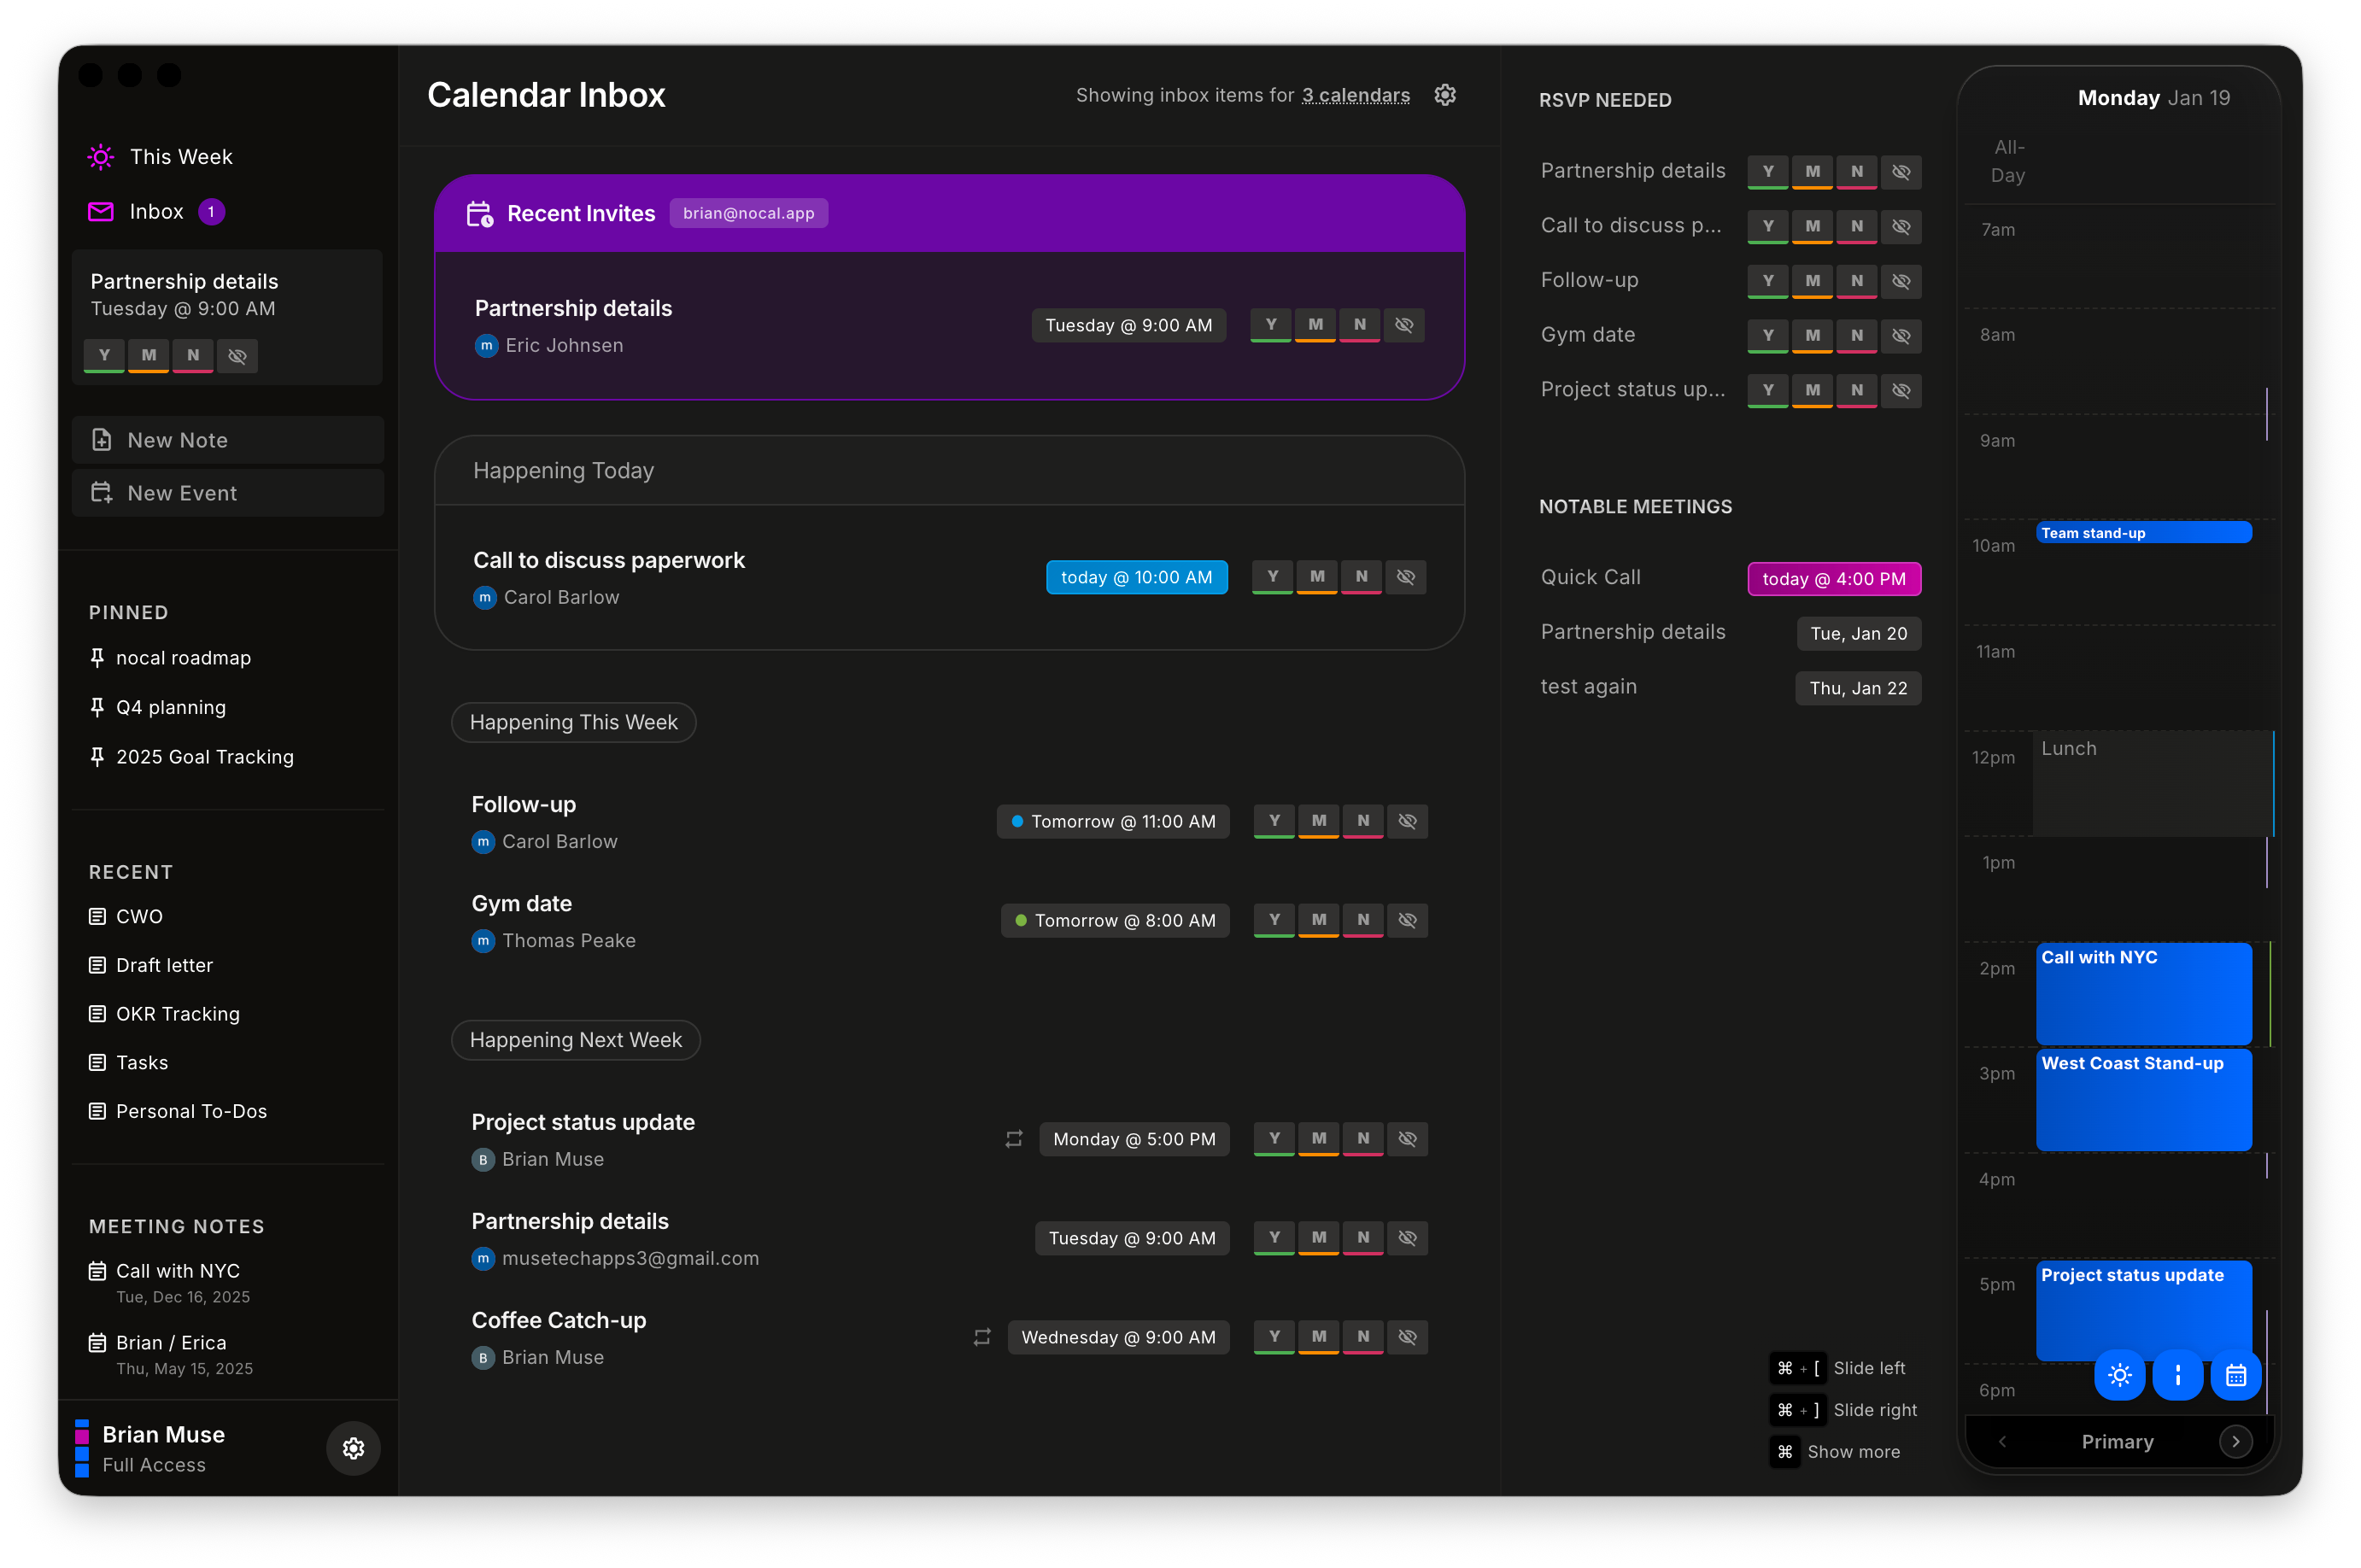
Pro tip: You can change which calendars feed your inbox anytime. Maybe you want family invites during the week but not on weekends? Just toggle the inbox setting.
Step 7: Connect Events to Notes
Your calendar and notes should feel like one system. Here's how to link them:
- Open a note — Create or open any note in nocal
- Mention an event — Type
@followed by the event name, or use the mention picker - Select from any calendar — Choose events from work, personal, or shared calendars
- The link stays intact — nocal keeps the connection between your note and the event
What this enables:
- Notes stay linked to the exact meeting
- Meeting context stays with your week plan
- You can organize meeting notes across your week and inside other notes
- Work, family, shared—it all connects
Conclusion
nocal gives you one place to see everything, one workflow to organize it, and one inbox to manage invites. Connect accounts, group by context, set smart defaults, and fine-tune visibility—then manage your time from a single command center.
Ready to merge your worlds?